
We’ve been in need of a good entertainment center from the time we’ve been together. I honestly don’t even remember what Joey used as an entertainment center before we lived together, but I’m sure it was awful because it was kicked to the curb about the same time I moved in. 🙂
Not that I brought with me anything that was too fancy either. We’ve actually been using the same entertainment center (if you want to even call it that) that Julia and I (and let’s be honest, my DAD) built when we first moved in together in college, circa 2001? It was fire engine red when Julia and I shared it, and man were we proud to tell people that we built it!
Later the entertainment center moved with me to the Pool House, and when I decided to evict whatever Joey was using when I moved in, well I brought old red with me. Except when it went with me to Joey’s townhouse we decided to paint it black…you know, to class it up a bit. HA.
Well it served us well for a number of years, but ever since we moved to the new house it started feeling a little TOO reminiscient of my college years. It was time for something more grown up, and we dreamed of something big and built in. With cabinets lining the bottom and shelving on the top. But it turns out custom cabinetry is expensive…shocking right?? So, then we looked at other options like the following from Ikea:
 Which actually as I type this I realize that this set has significantly gone down in price since we first looked at it, so it may go back on our list in the not so distant future as more of an option. Especially if we doctored it up to look like a built-in unit. But even with the drop in price, at $750 it is still out of our budget for now.
Following the kitchen reno, our budget for the rest of the house has become very limited. As in, I was told by my husband, no more “projects” for awhile. So I put the entertainment center on the back burner and moved on with life.
Then, in August when my brother moved to Raleigh, and had no furniture of his own, we decided that it was the optimum time to unload gift our entertainment center to him.
🙂 Luckily, we had picked up an old dresser from our friend Summer a few months prior. She was moving and decided she didn’t have room for it anymore, so we took it off her hands, not really knowing where we were going to put it but there is always room for a free dresser. Actually, when we picked it up I thought it would be the perfect size for a future changing table/nursery dresser. But when we decided to gift Justin with our entertainment center, we decided that we would try to re-purpose the dresser as an entertainment center.
I forgot to take a true before shot of it. 😦 Bad blogger. But let me paint a picture for you first…this dresser was free even to Summer! She inherited it from an old roommate in college that didn’t want to move it. It had a tall sibling, that I’m kicking myself now for not grabbing. But it was cream, almost a yellow, and it had very purposeful brush strokes that could be seen, its probably some 90’s treatment like rag rolling that I’m not aware of…but it was definitely some sort of treatment. It also had some terrible wooden hardware we snatched out immediately.
 I wanted to paint it a fun bright color like turquoise. It was a free dresser, we could take some risks. But Joey promptly shot that down and told me I should paint it white or black. The man has trouble “seeing” my vision…but to be fair, I’m glad he reigned me in because the end result works so much better for our house and the space.

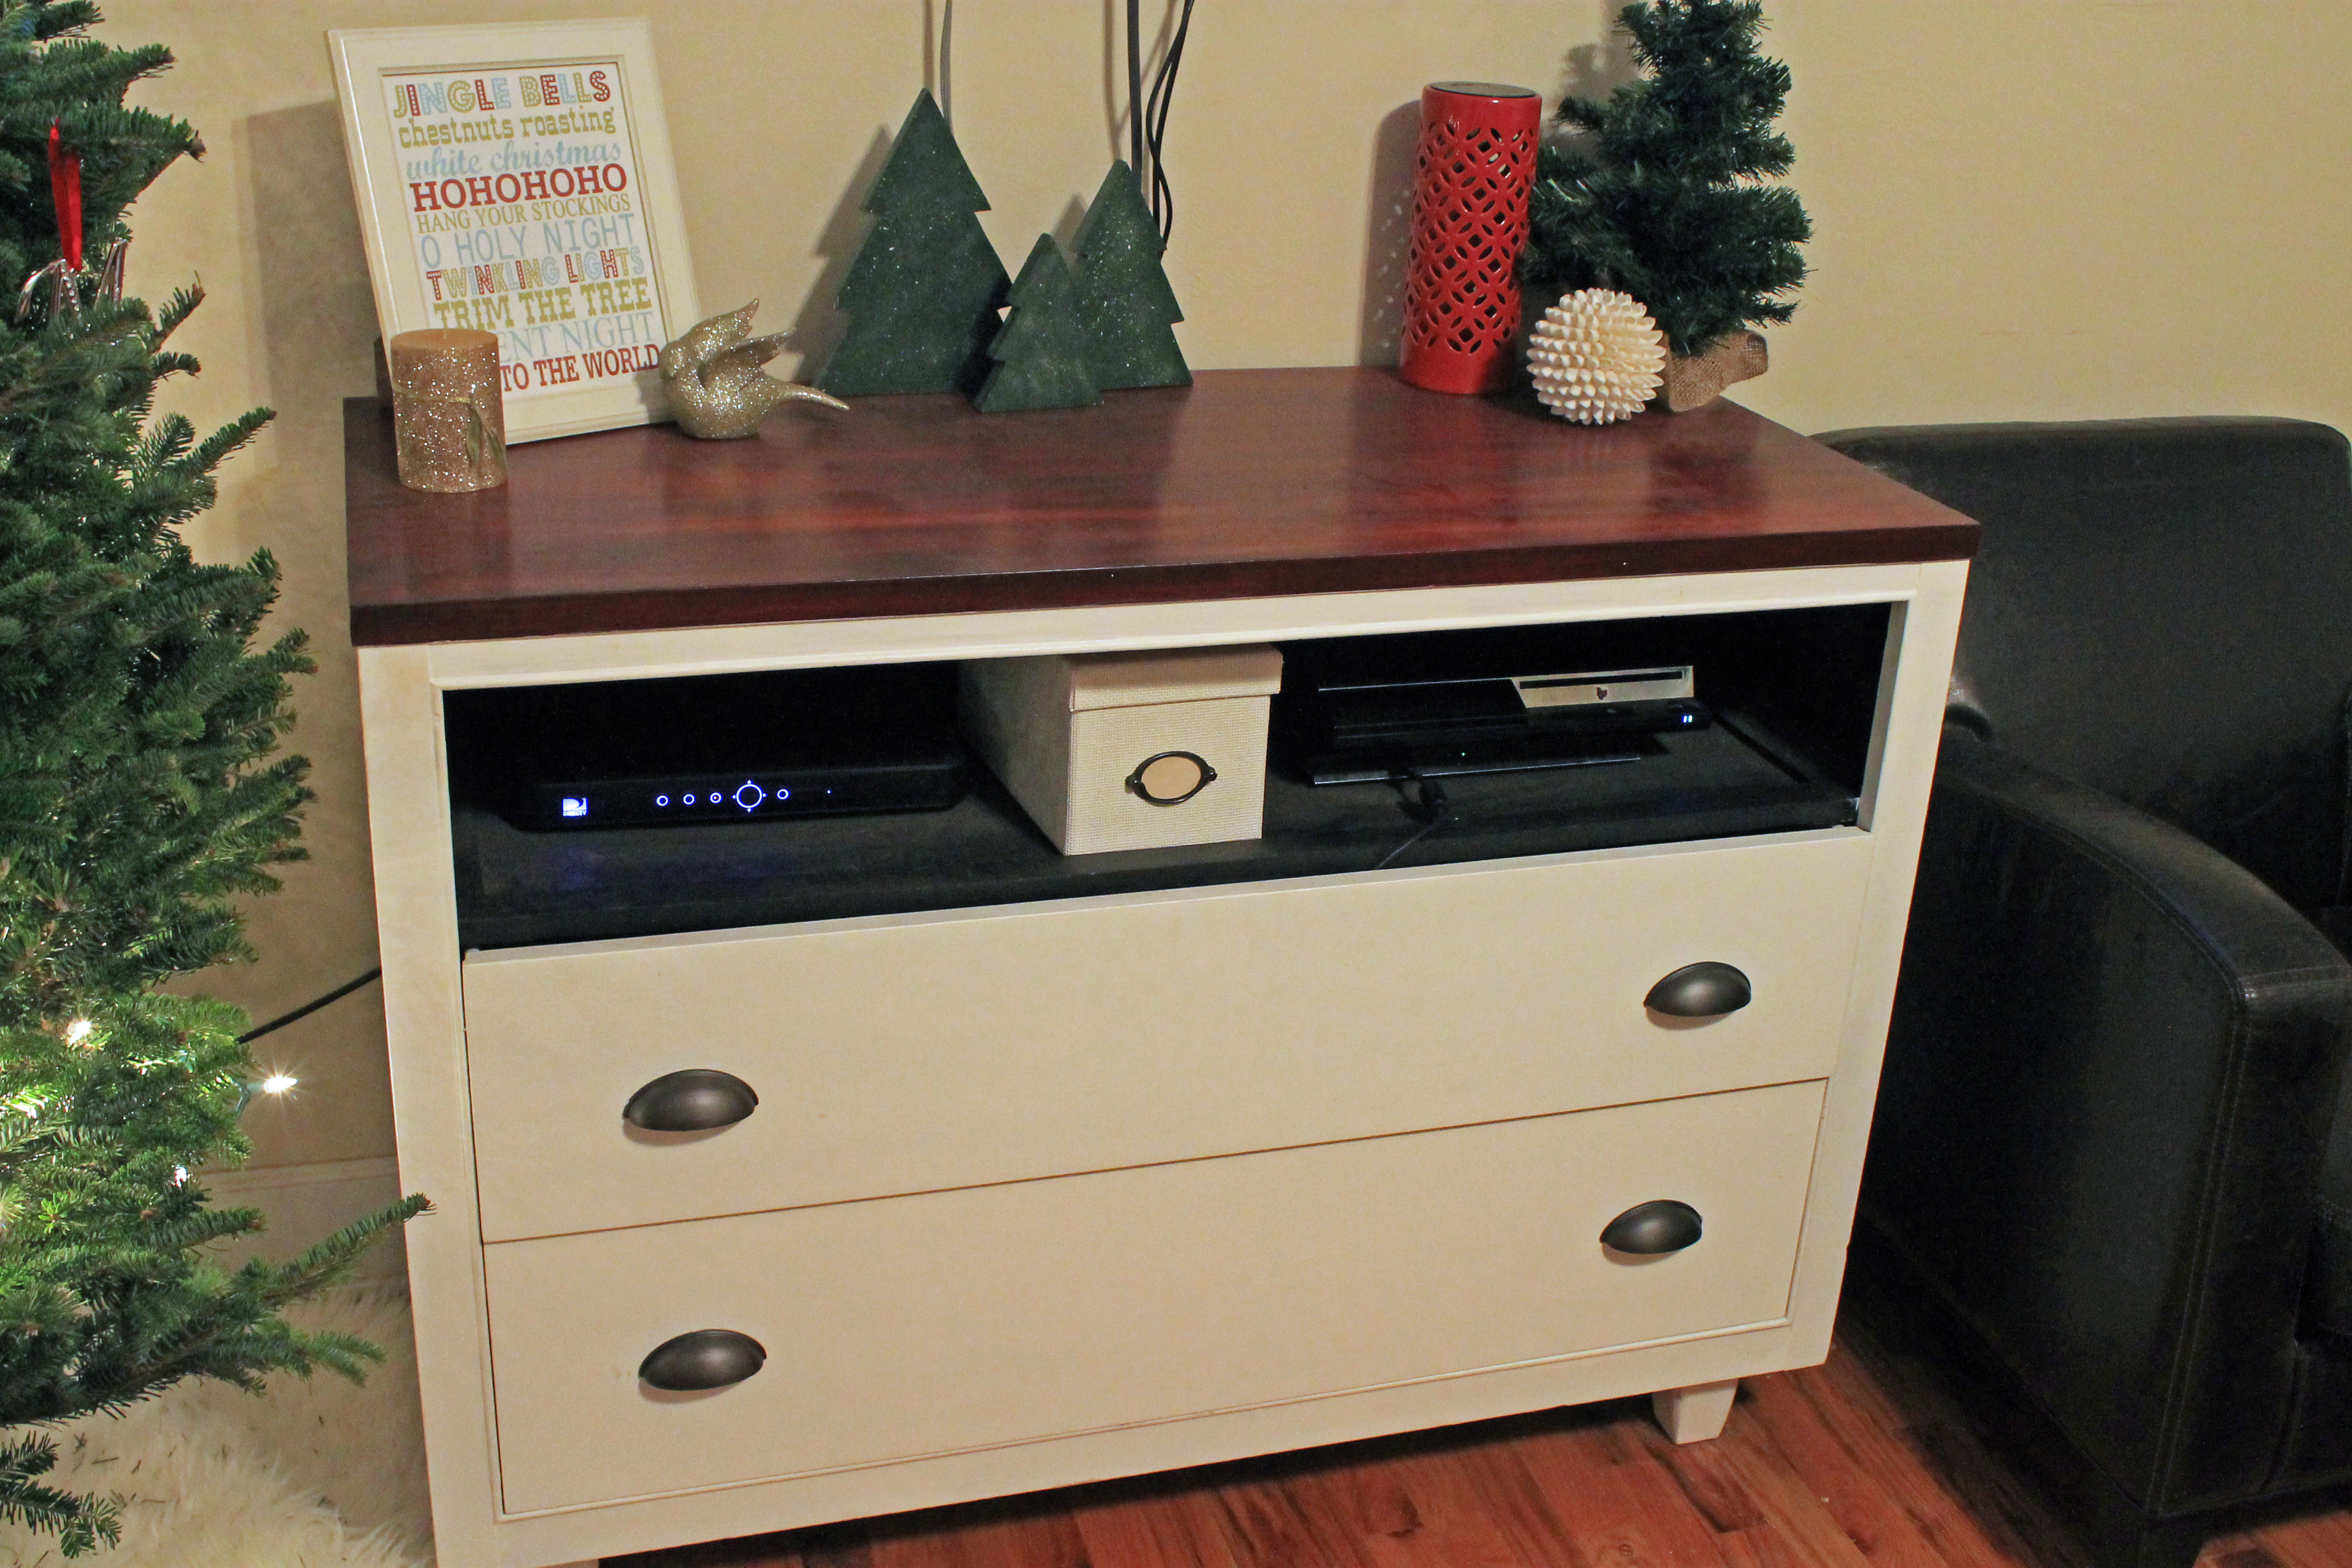
I went back and forth on whether to paint it white or stain it cherry like our kitchen cabinets. Joey didn’t think it would stain since it had already been painted…I knew in my heart that gel stain was magical like Pandora Radio, and would work. I decided to try my hand at a two tone finish. The plan was to take the top drawer out, and use it as a shelf for our electronics. Then to use the bottom two drawers for dvd/game storage. My dad advised to use a matte black spray paint to paint the inside of the empty shelf so that it will fade out and be less noticeable. That is what is going on in the photo above.
We decided that to make it work as an entertainment center we needed to add some height to it…so we tore out the legs and decided to add new ones. The ones in the photo above are the new ones. You’ll notice a slight problem in adding the new legs…
 There’s about a quarter inch gap in between the dresser and the legs. Womp Womp. The issue is the hardware. Because this dresser did not have screw in legs, we had to buy a special hardware that would attach it but it had a raised configuration so there was really no way around it.
Source:
We went back and forth about it, debated adding trim around the base, talked to my dad about it, debated some more…before it finally dawned on us that if we just moved the legs a bit inward it would be perfect because the outside edges of the dresser were reinforced, but the inside wasn’t so there was a difference of about a half inch that would cover the gap perfectly. The lesson here is that sometimes it takes weeks to come up with a solution that was right in front of you. So don’t get discouraged.
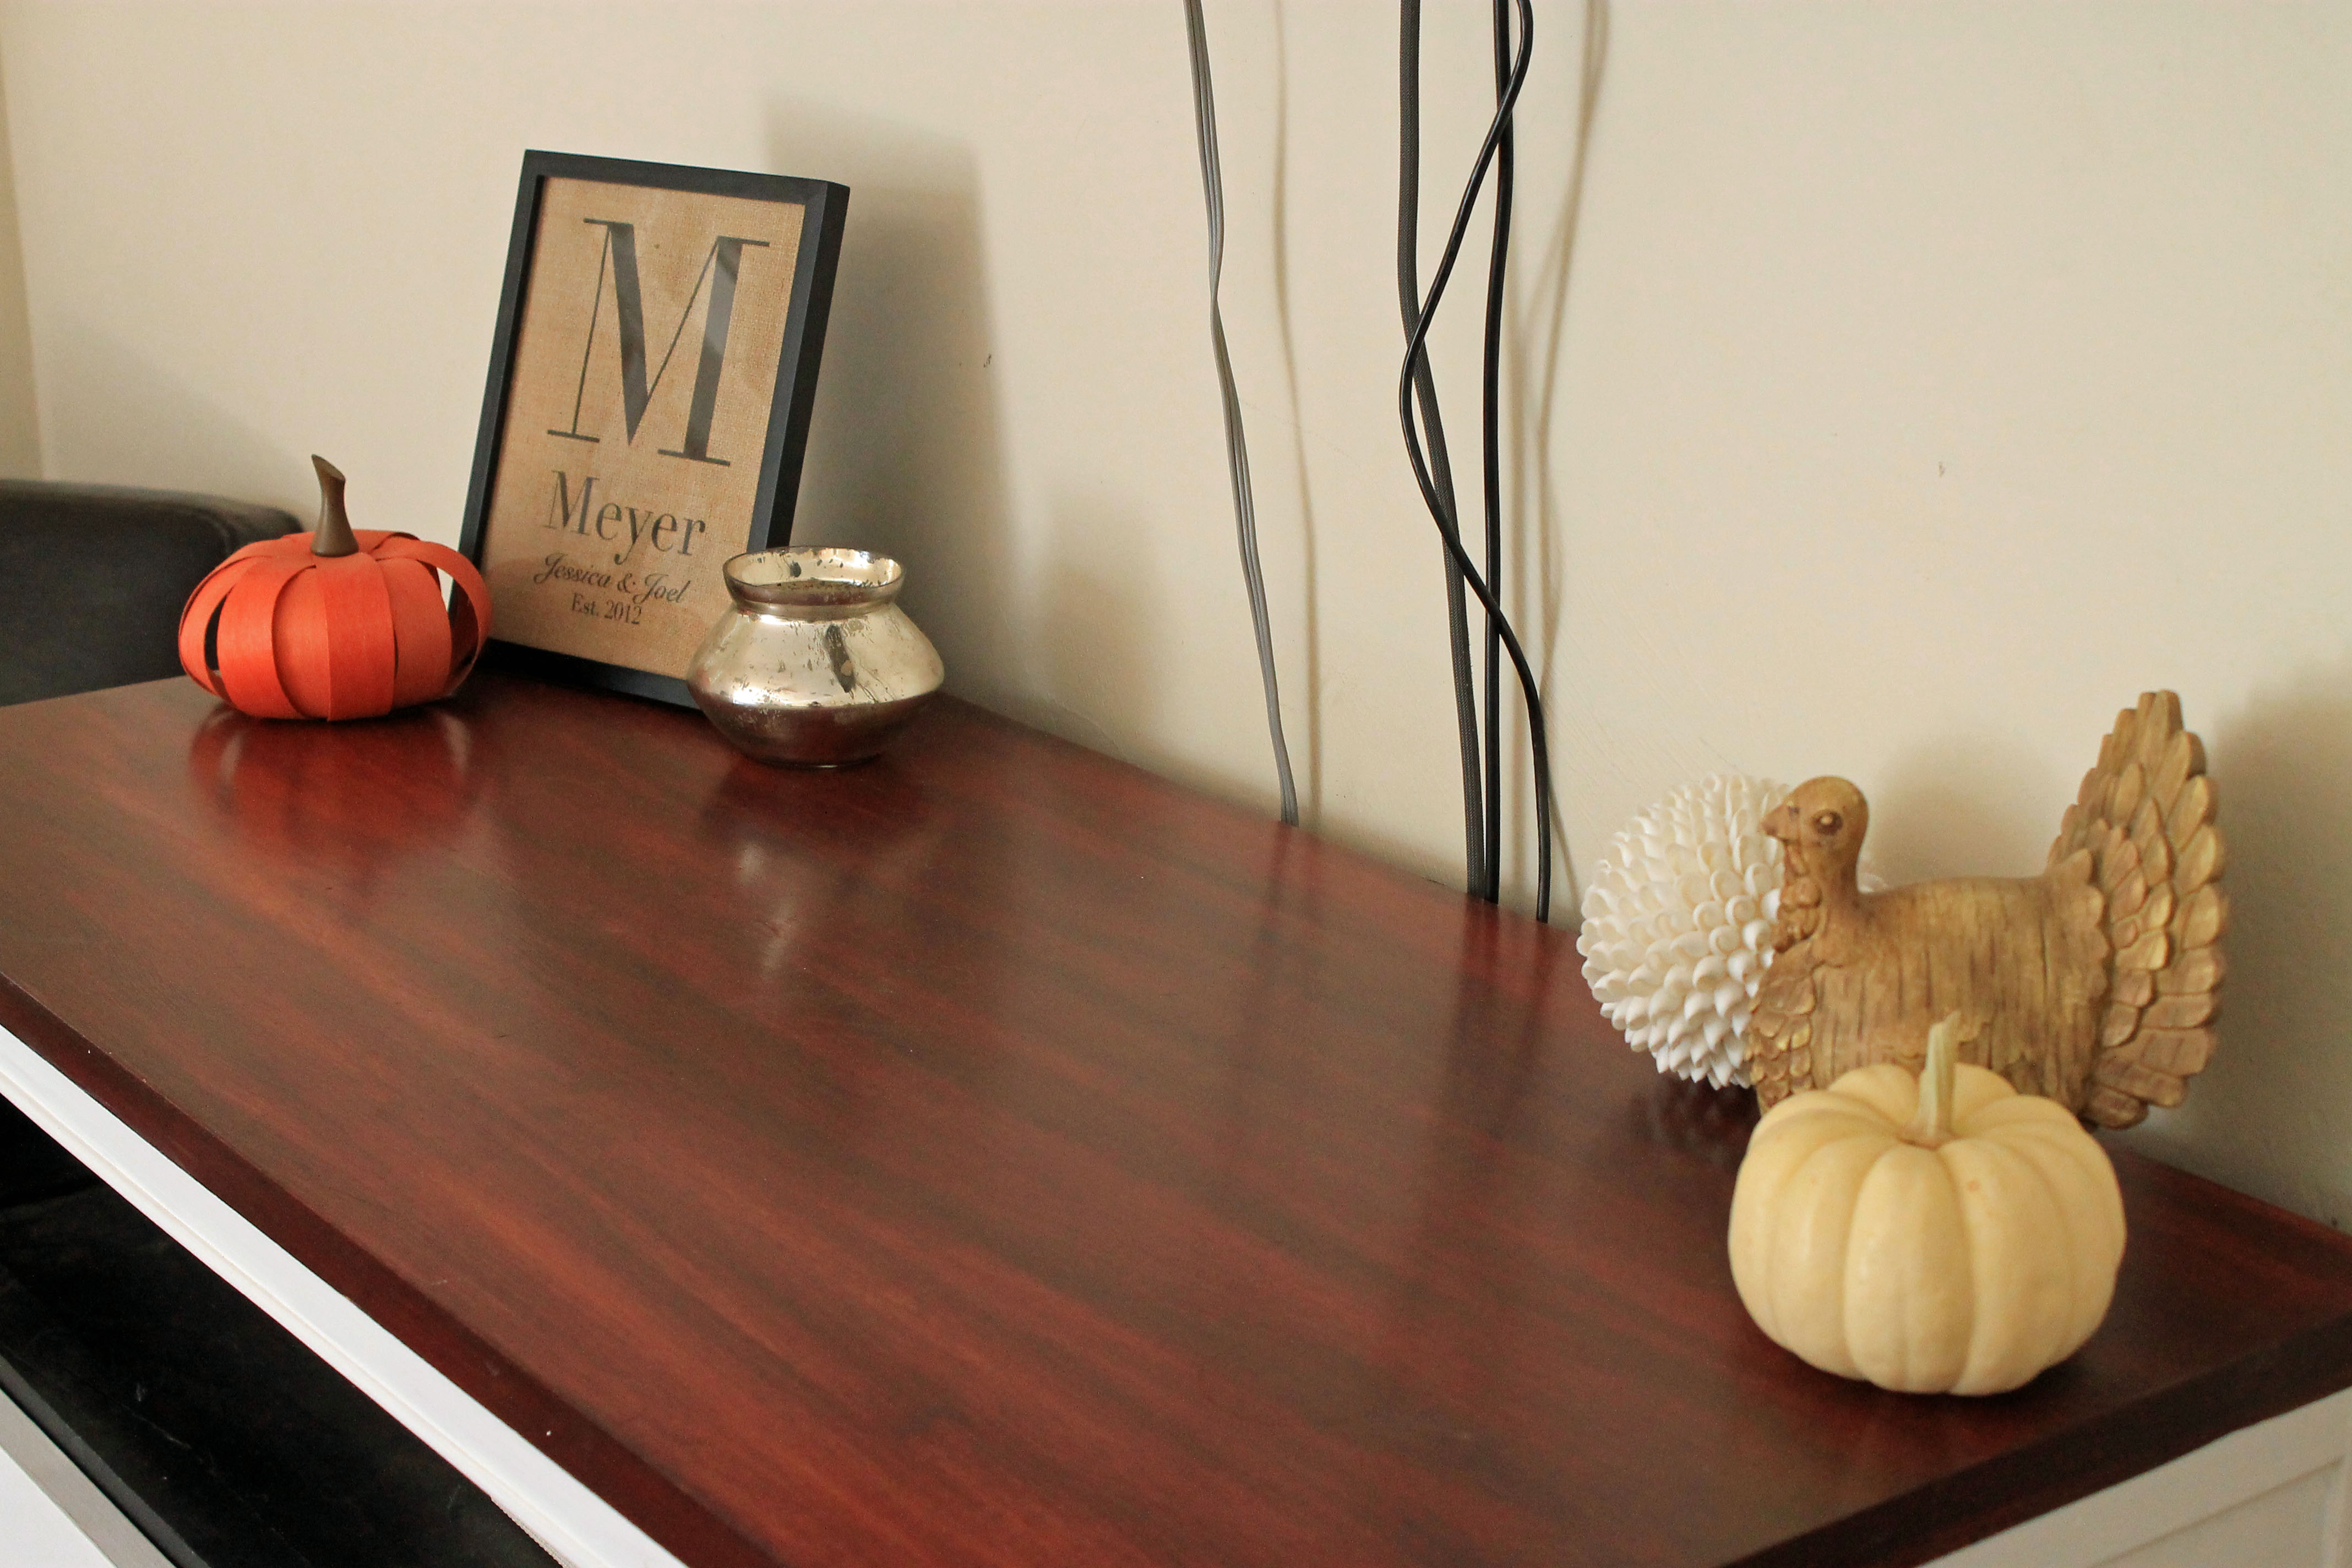
 Here it is with a fresh coat of white paint, and the first coat of gel stain. You can find out more about this magical gel stain from my kitchen cabinet post here.
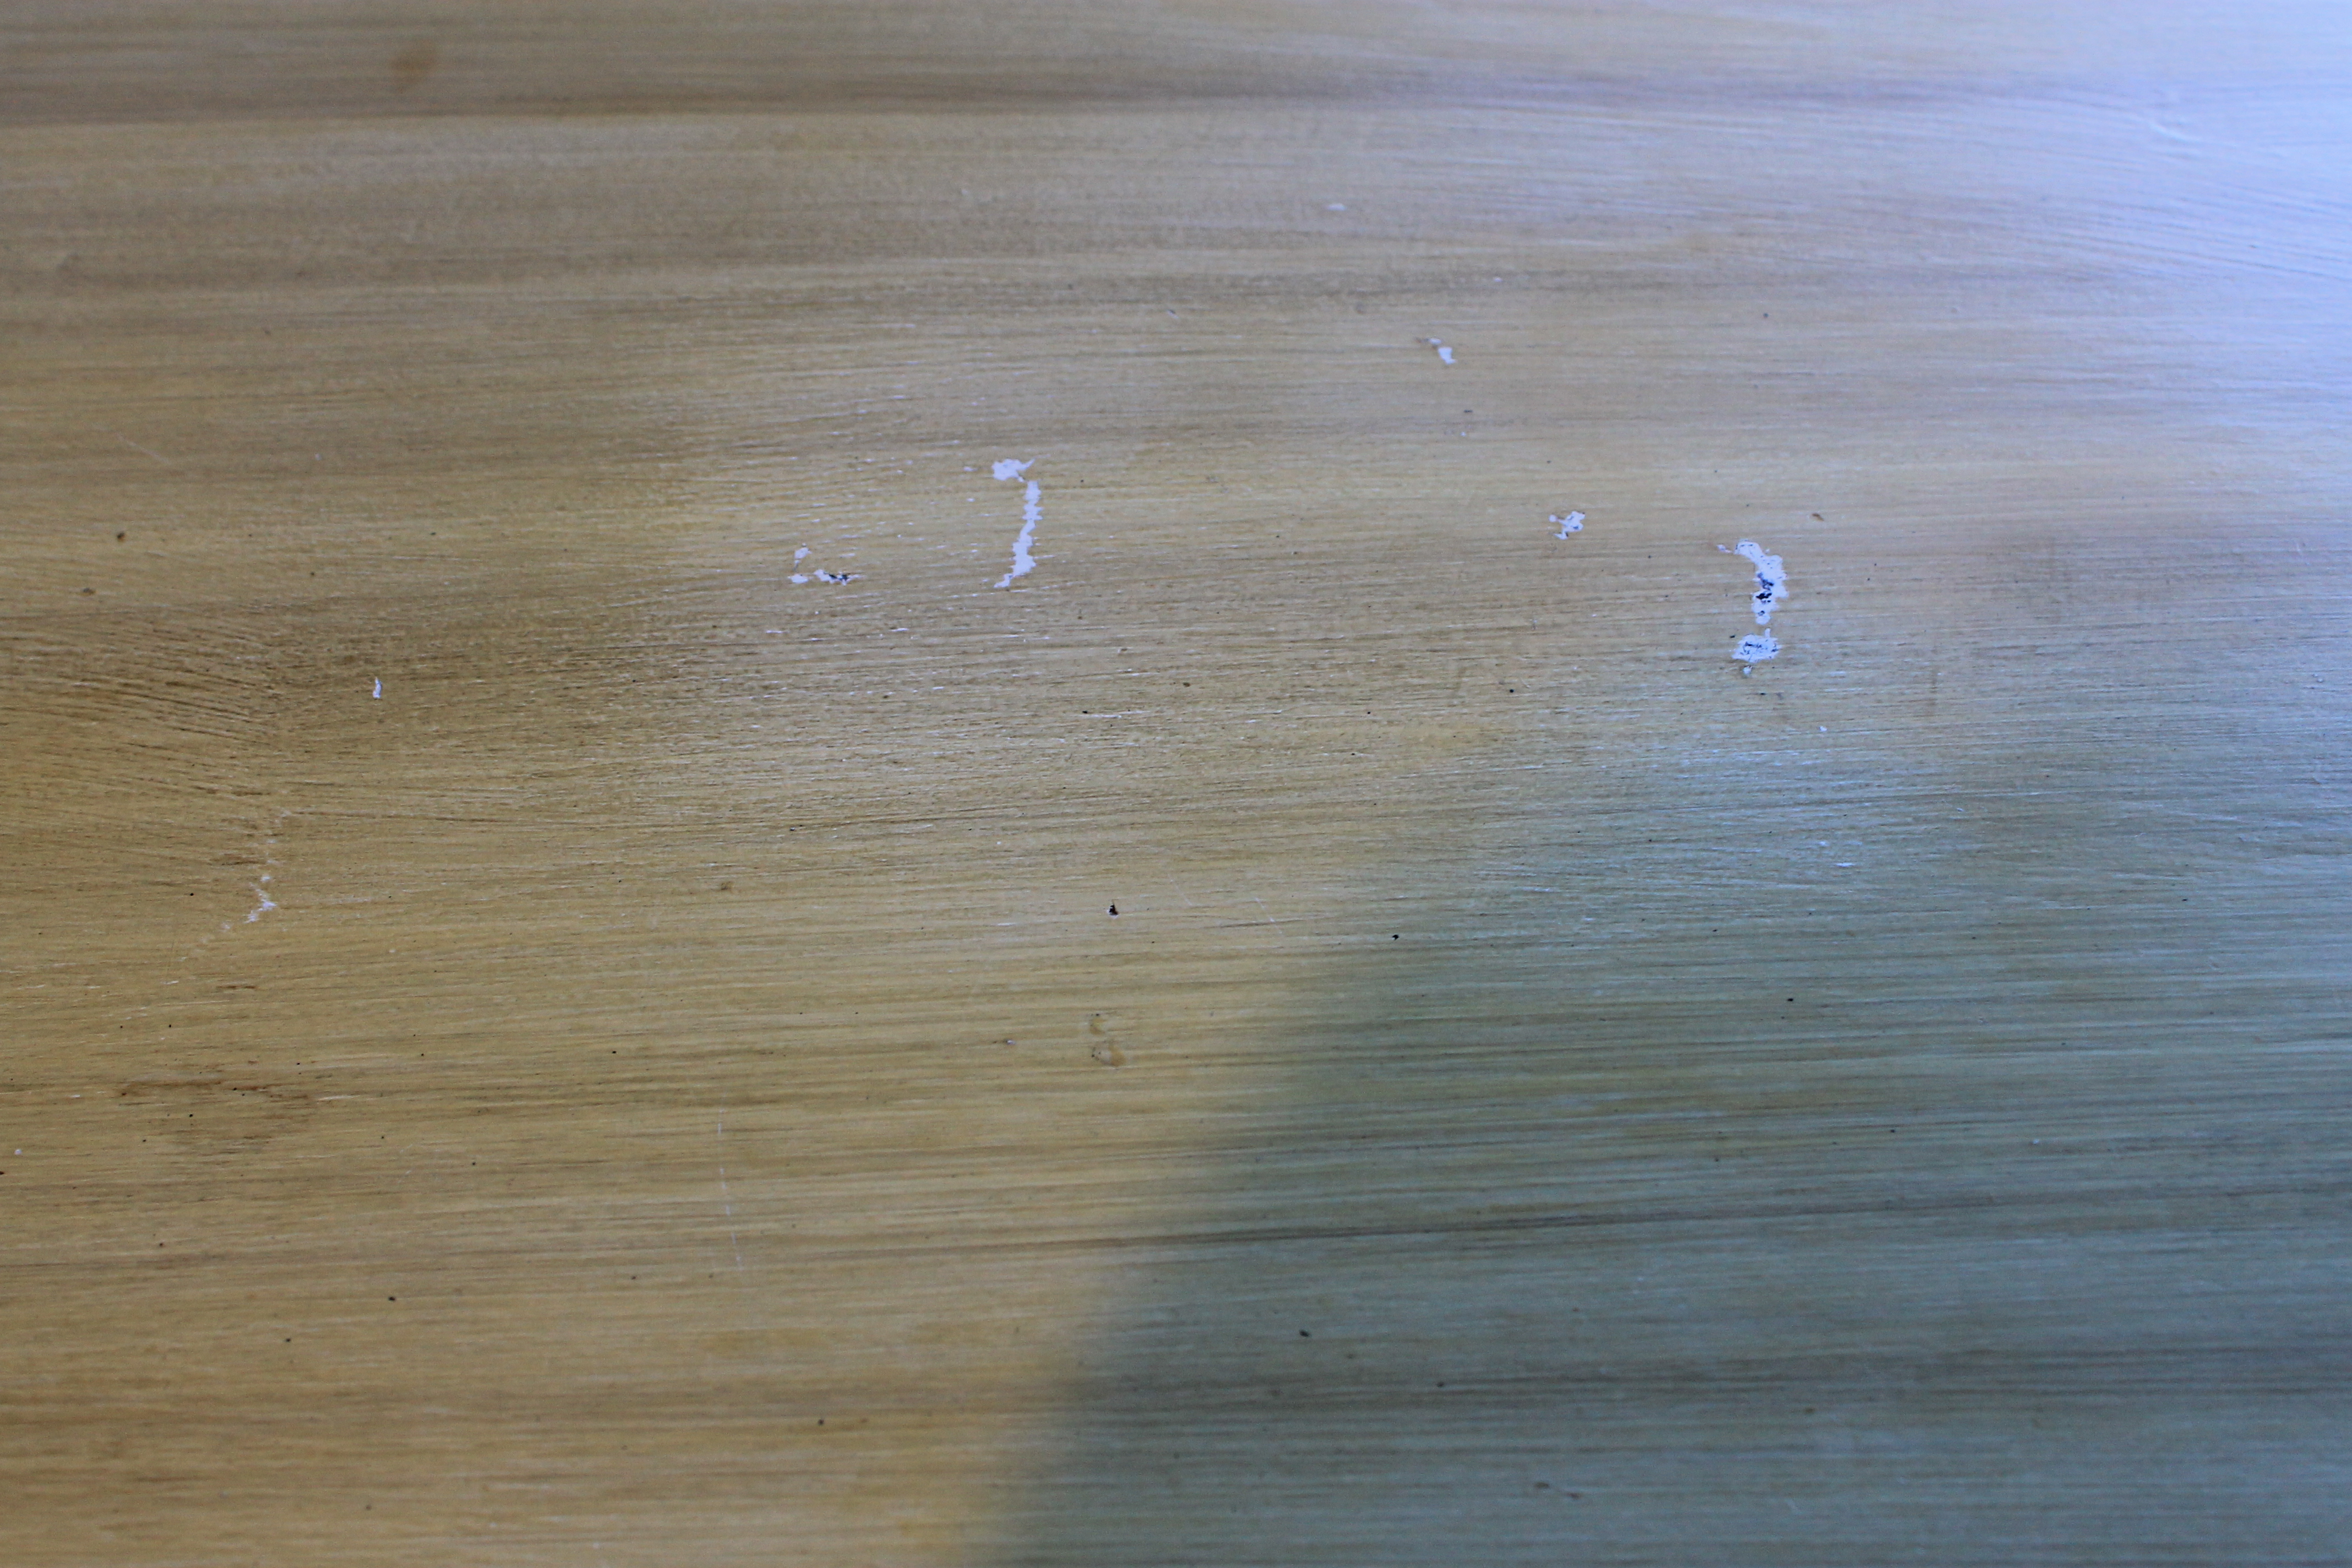
 Still the first coat, but you can see how uneven it is and streaky. Some of this is from the brush strokes that were already there, but some of it is just because that’s how the first coat of this stain looks.
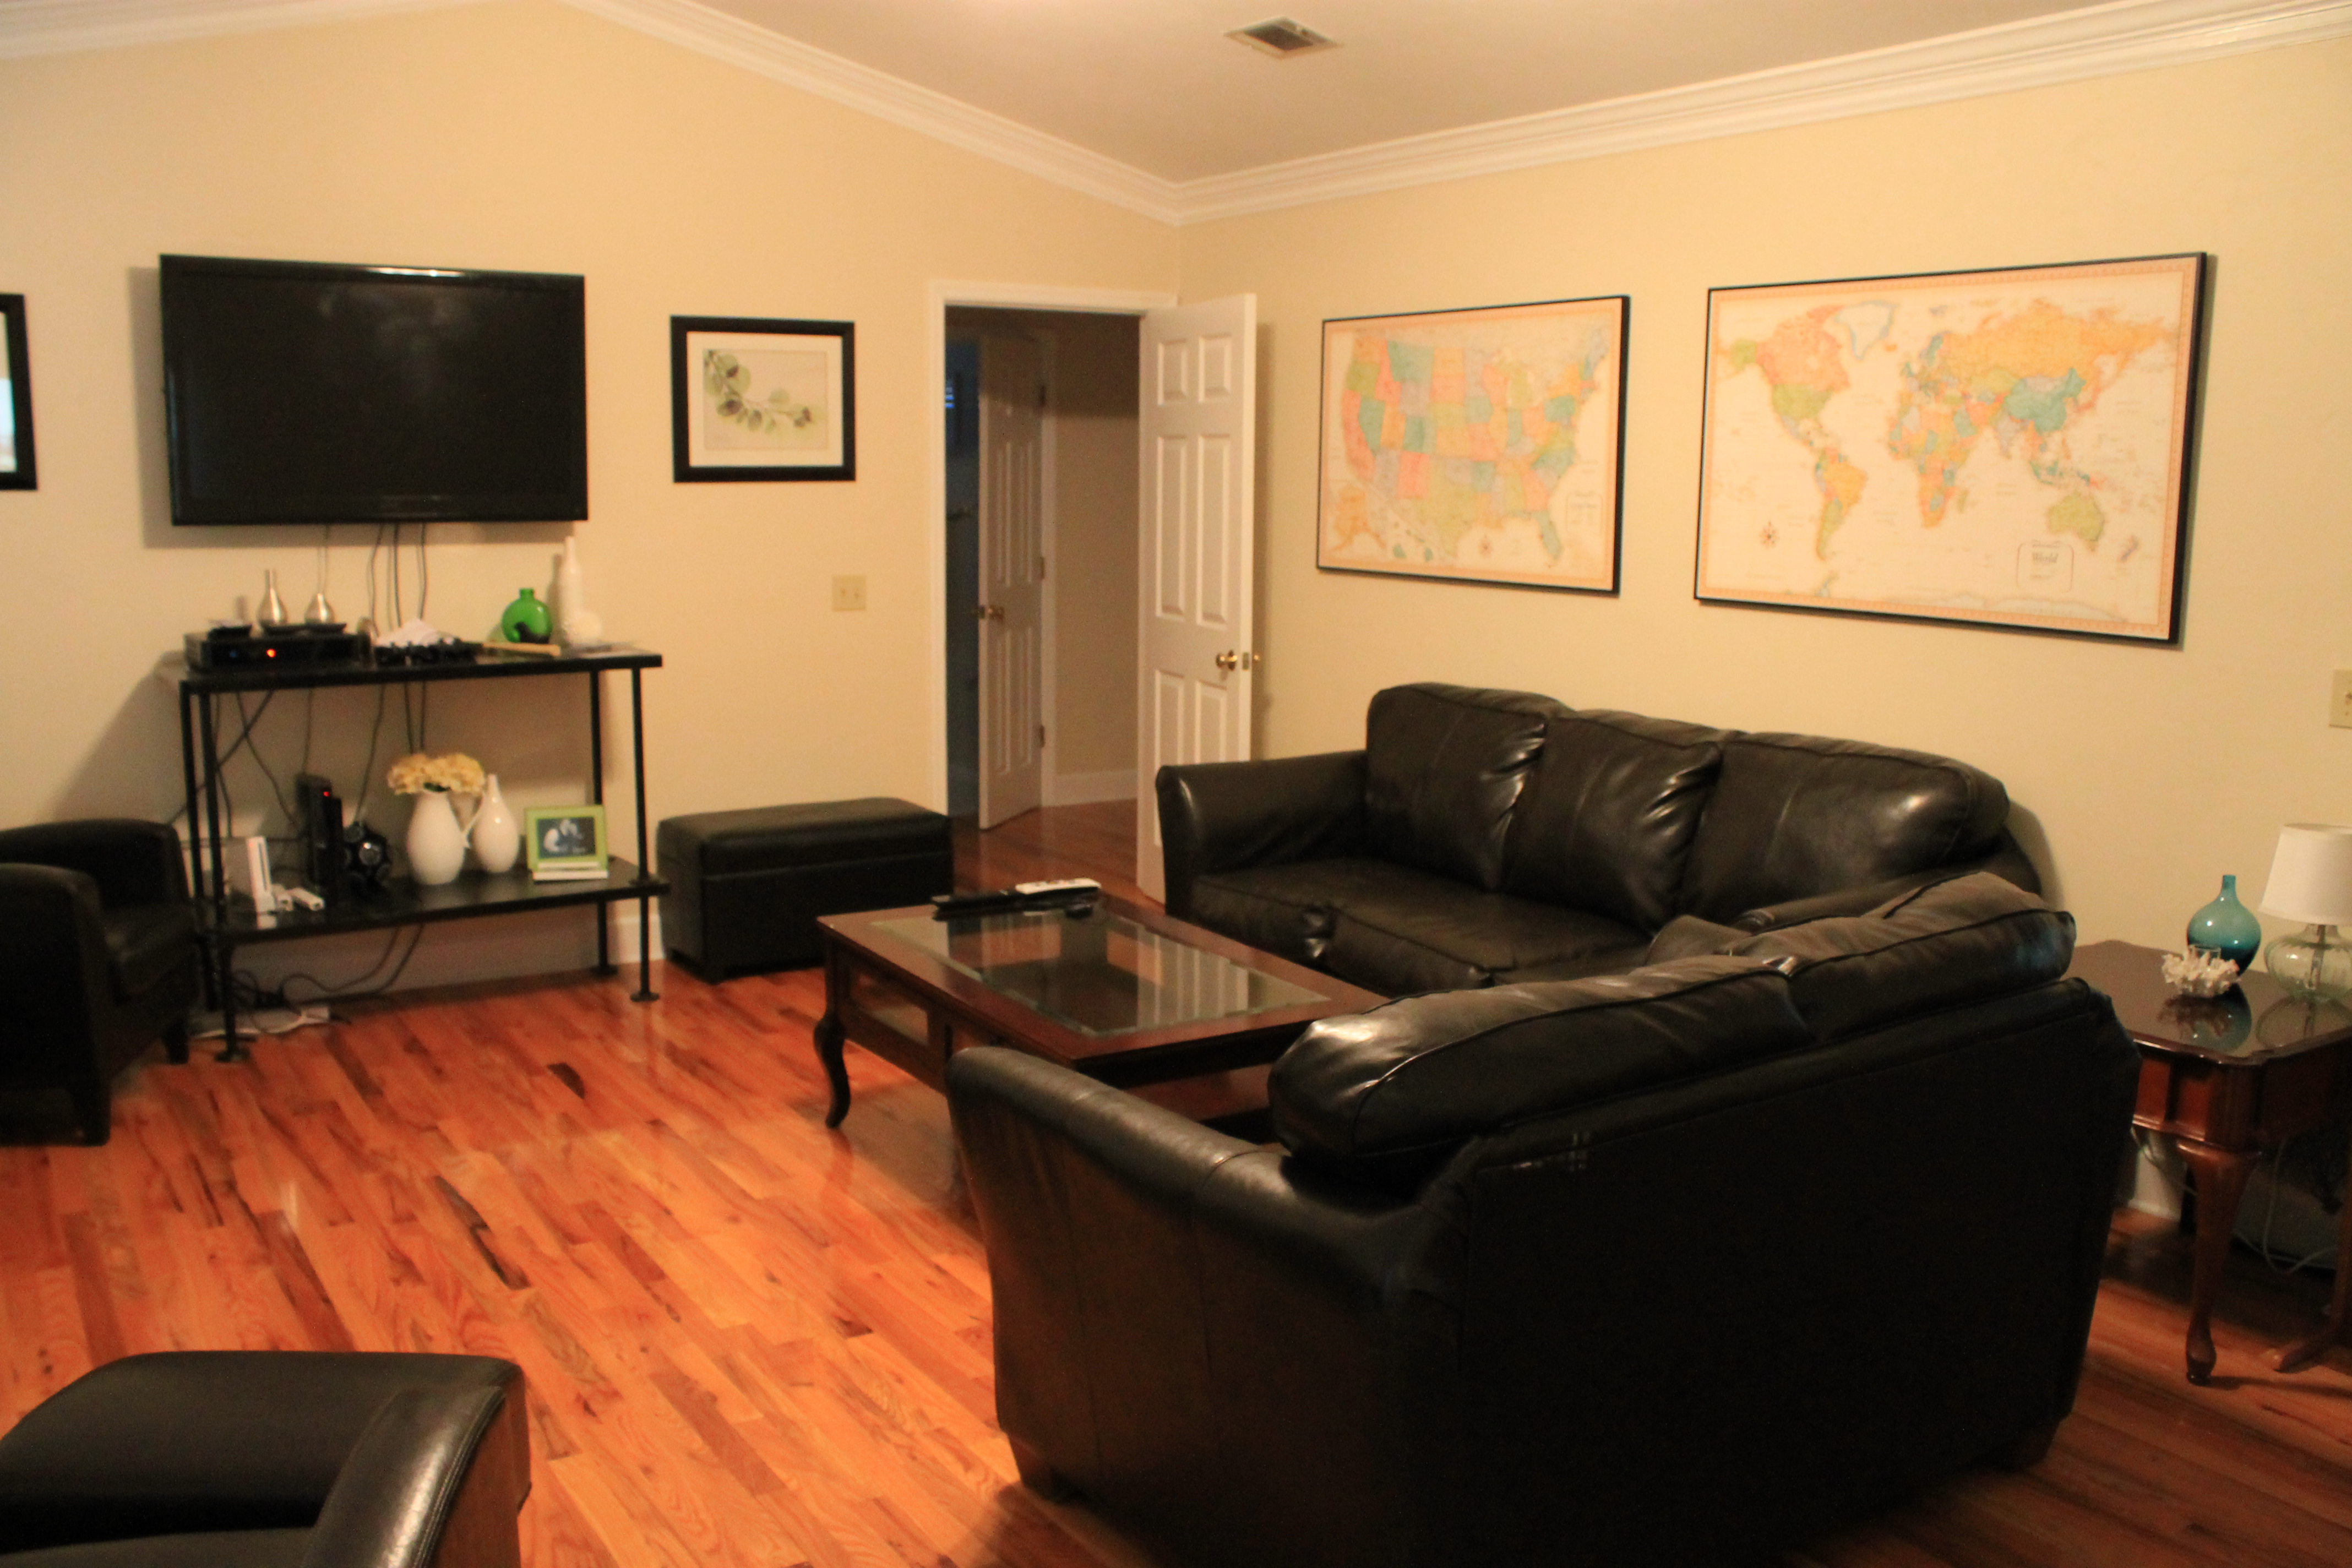
We used spray Zinsser Bullseye primer to prime the dresser, and then generic white flat paint to paint it. If I could do it all over again, I would have bought good paint to do this project, but we worked with what we had and what we had was cheap white paint we used on the craft room desks. We had some issues with the hardware, the hardware I picked out (and ordered because both HD and Lowes FAILED me) came with screws that either did not fit the hardware, OR we have particularly thick drawers, either way we had issues getting them to anchor firmly. And this is an issue that continues because I love the hardware and haven’t made it out yet to buy new appropriate length screws. But they’re in, and they look pretty, they’re just not all that stable. haha. So I should work on that. In the meantime, feel free to ooh and ahh over our pretty new more mature entertainment center!
It needs a little poly, I got so excited about it being done that I didn’t actually finish it before we brought it inside and set it up. haha. I NEED to give it a nice coat of poly on the inside so that we can more easily wipe the dust away (you can probably see that its more grey than black right now) and so that the top will be nice and shiny. And drink ring resistant. Need that for sure. But its easy fix, and I’ll do it one day…probably the same day that I put the right size screws in the hardware…haha. 🙂
Thank you Summer for saving this baby for us!! 🙂 It loves it’s new home!!
